Devin Devine, traveling stone mason
Natural flagstones should be well fit. This takes a bit of work. Often you have to cut the stones, with hammer and chisel. Or with a diamond blade. Or some combination method. In this article, I will try and explain a few rules, or guidelines rather about flagstone shapes. I’ve came up with these rules over years of observation and experimentation. They’re not hard and fast rules, but if followed, you will end up with a decent looking natural flagstone patio.
Yes, I still offer phone consultations
DIY hardscape/masonry/flagstone help rates:
$123.00 for one hour
$80 for a half hour
Monies are payable via Venmo (preferred) paypal or zelle
3 rules guidelines about how to make your natural flagstone patio look good:
- Avoid pac-men.
- no surfboards.
- try and avoid angles sharper than 45 degrees, known as “talons”.
- no cross joints.
Related content:
- how to build a flagstone patio
- how to level flagstone in stone dust
- cutting flagstone using a brick hammer
These 3 articles, along with the one you’re reading now, will tell you pretty much everything you need to know. If you need personal guidance, I offer a phone consultation service and have helped hundreds of home owners build their own hardscapes.
Related content: consultation services
I’ve been doing this since 2015… every single consultation customer has been appreciative, never a complaint and it’s awesome. I’m happy, customer is happy, life is good.
What’s a cross joint?
A cross joint looks, like a cross–like a lower case “t”. I did not always consciously follow this guideline myself. Years ago, I would simply follow the first 3 guidelines, and try to make the work look good, and because of this I tended to almost never have a cross joint. This guideline is not needed, for any structural reason, for flatwork, patios and walkways. For walls, cross joints are a weak point, to be avoided. For flagstone work, it just generally doesn’t look good–although there may be times where design-wise, you may choose to forgo this guideline, if you were going to do a stacked bond or tile-like design–but this article is about fitting flagstones together in a naturalistic way, in which case, avoid the cross.
Well, if you’re doing a running bond, or “random” dimensional flagstone–you’ll still want to avoid the cross, as cross joints don’t look good in these scenarios either.
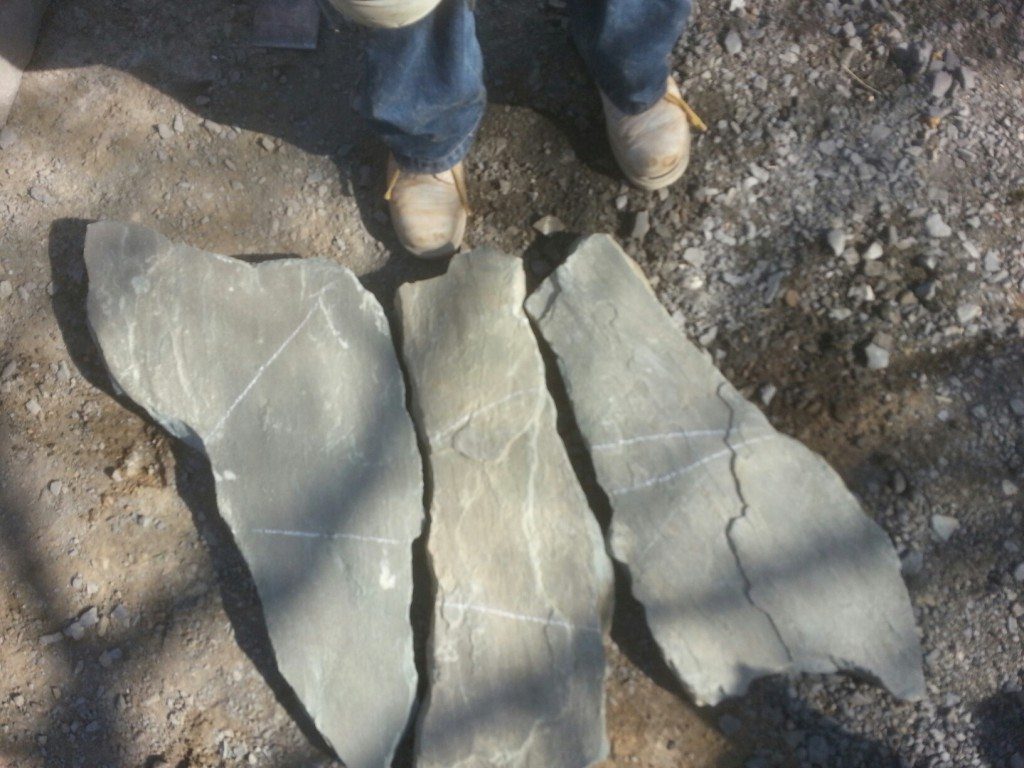
Above is a photo of what I call “surfboard flagstones”. They are long and narrow….and they do not look right in a patio. Okay, one or two of them on a patio fine…but I bought a pallet of flagstone the other day in-which half of the stones were like this–long and surfboard shaped. To use them like this in a patio just would not really look right.
(again, there are always exceptions. I know we could come up with an artistic concept that made usage of these surfboard shapes…but we’re talking about the natural look right now)
Essential tools for flagstone installation:
- GRABO, the hot new vacuum lifter that makes lifting flagstones a bit easier. My review can be found HERE.
- dead blow type mallet. Many types to choose from….lately I mostly use my rawhide mallet, but the rubber headed modern style .deadblow is in my tool bucket too, and I’ll use whichever is closer on hand.
- brick hammer, for cutting flagstone.
- with diamond blade.
- Angle grinder. Same one I use. Keep this on hand for cuts that the hammer won’t successfully make, or that will take too long with the hammer
- Diamond blades.
- Brick chisel.
- A couple of 5 gallon buckets (for stone dust, when leveling stones)….shovel, wheel barrow…..4′ level
- Pick maddock. Best way to dig. Break up soil with this, then use shovel.
- Knee pads–essential.
- Hand tamper and/or plate compactor. For 100 square foot or less, I’d just use the hand tamper. Bigger than that–you might want to rent plate compactor.
Certain shapes of natural flagstone are always easy to work with
- triangles (greater than 45 degree angles)
- pentagon house shapes stones
- bell or cone shaped stones (like a triangle who’s one point has been cut off, leaving a 4 sided bell shaped stone
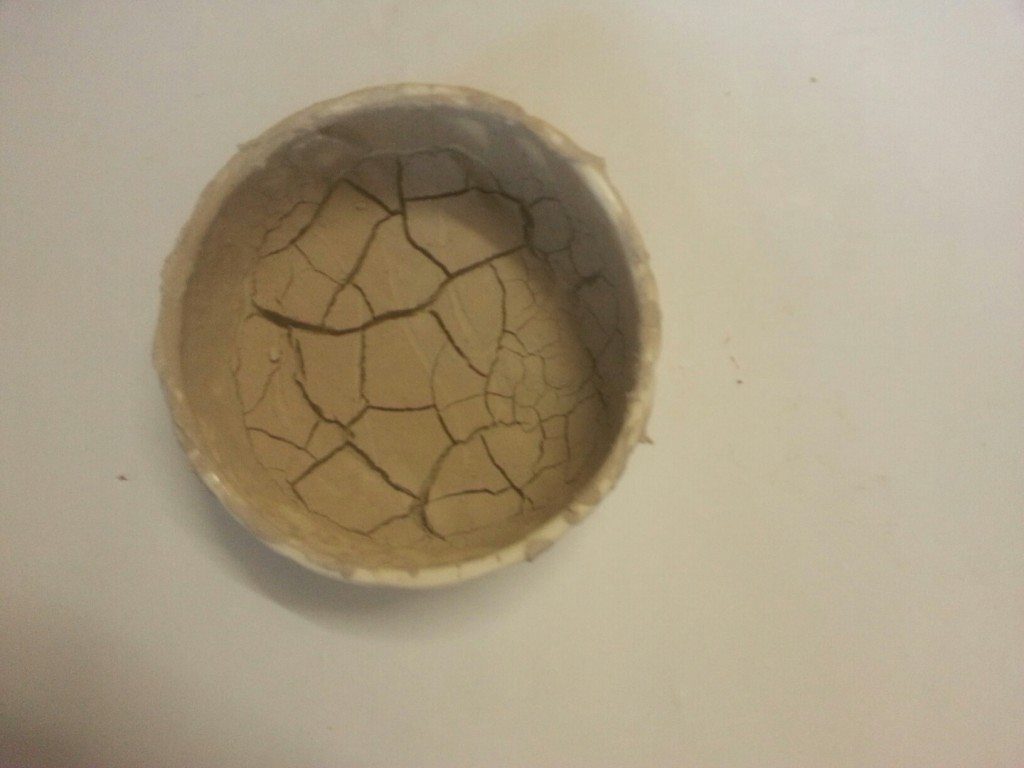
Below is a bowl of clay slip that I had sitting out. I was doing some ceramic work and had some watery clay sitting out. It sat out for a week and when it dried, the clay was all cracked up. You can see this same effect any time bare clay soil dries out. It cracks up like this. With no pac-men, no surfboards and very few angles that are less than 45 degrees. Black-top and concrete both break up into such shapes as well. Cross joints do happen, though.
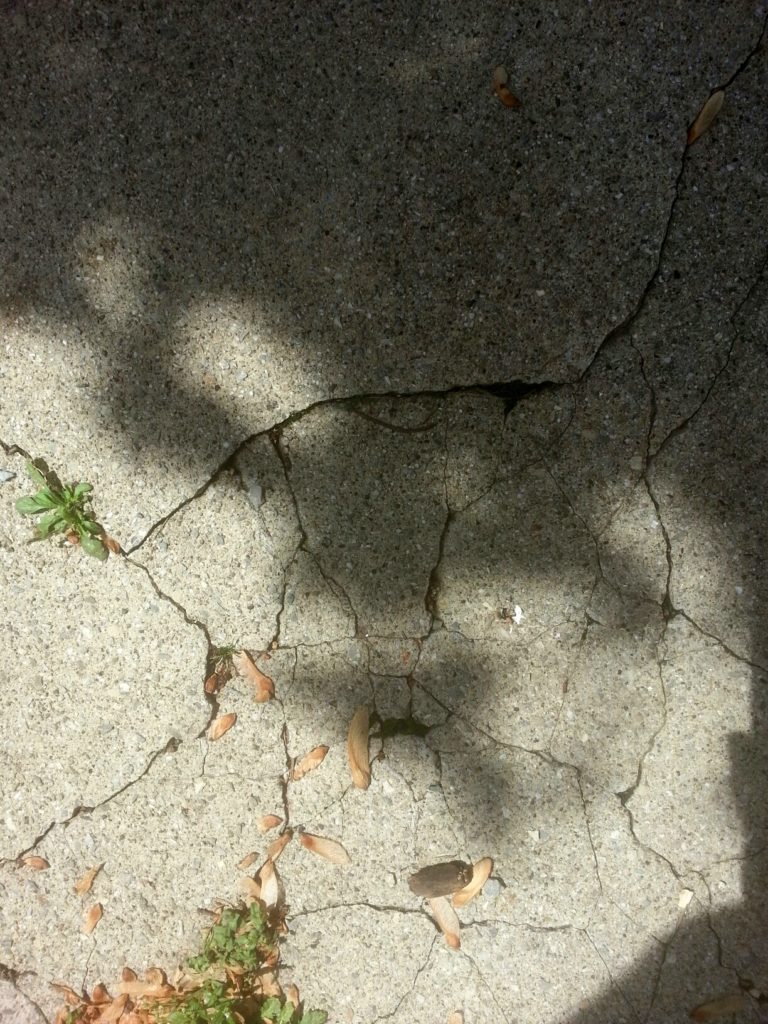
cracked pavement
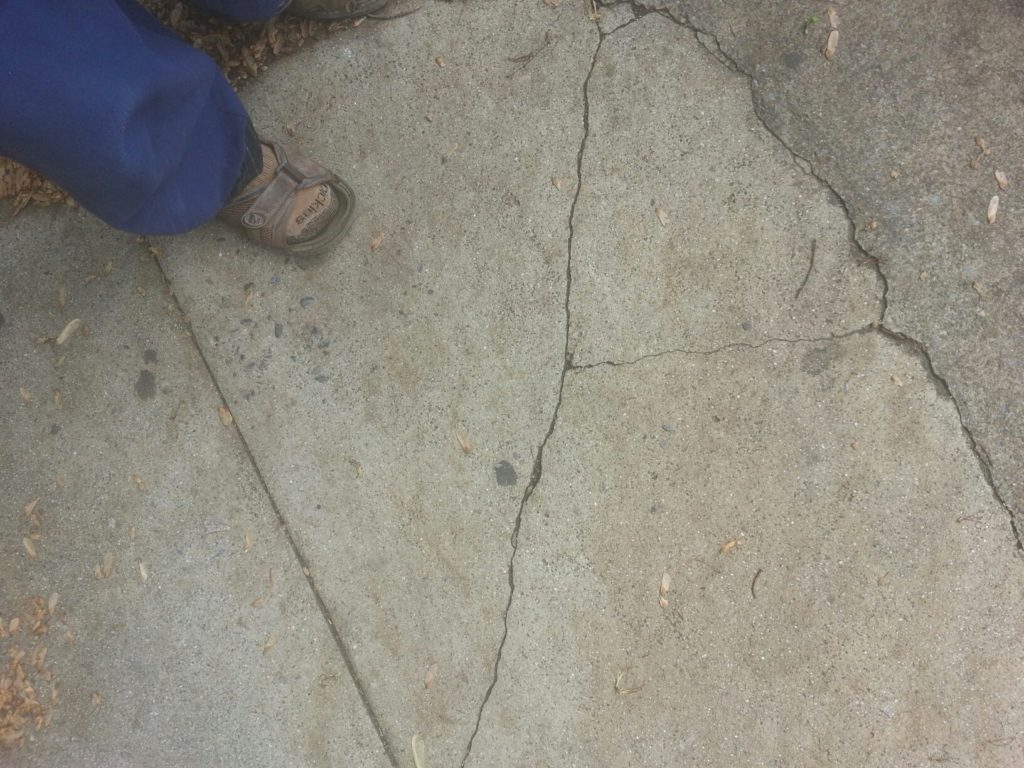
I pay close attention to broken pavement…and have many more photos like this. And I’ve been sporting socks and sandals since long before it was cool.
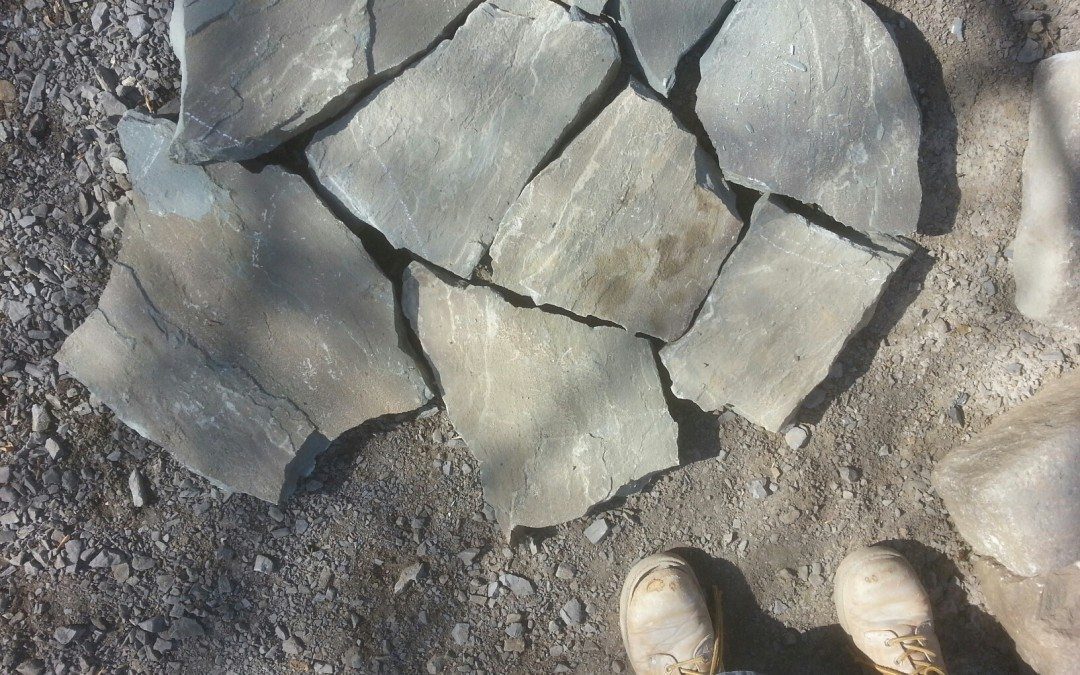
So I took the surfboards that were among my flagstones and I marked them out for cutting with hammer and chisel.
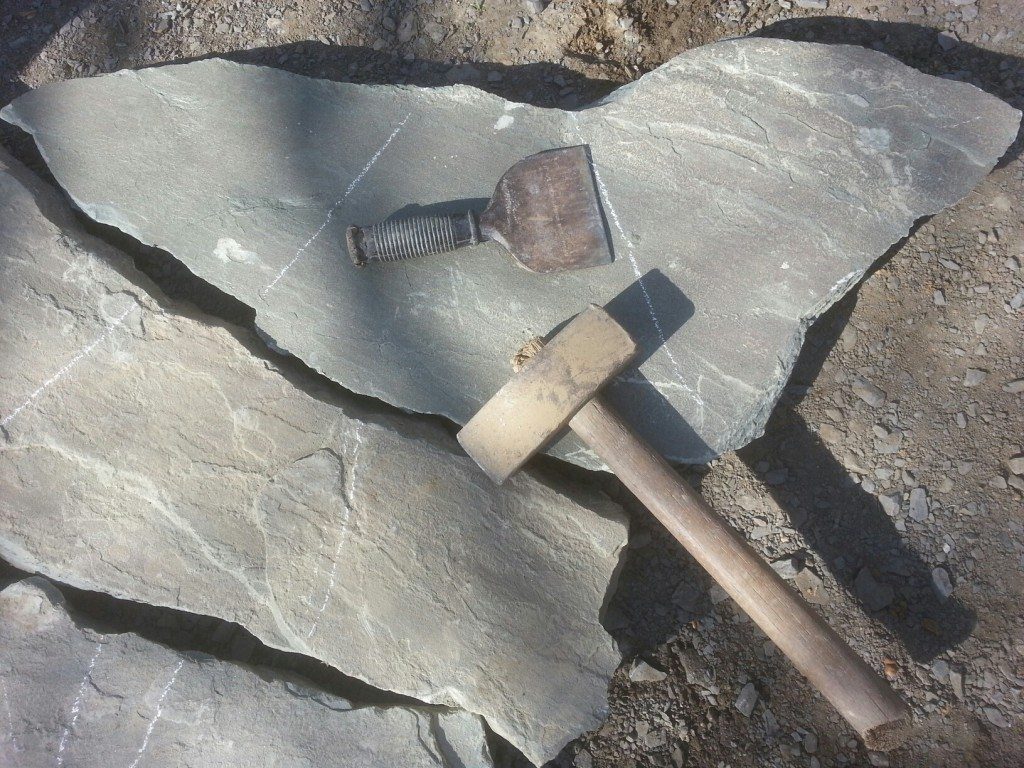
And I broke them down into more natural shapes. Look at this photo:
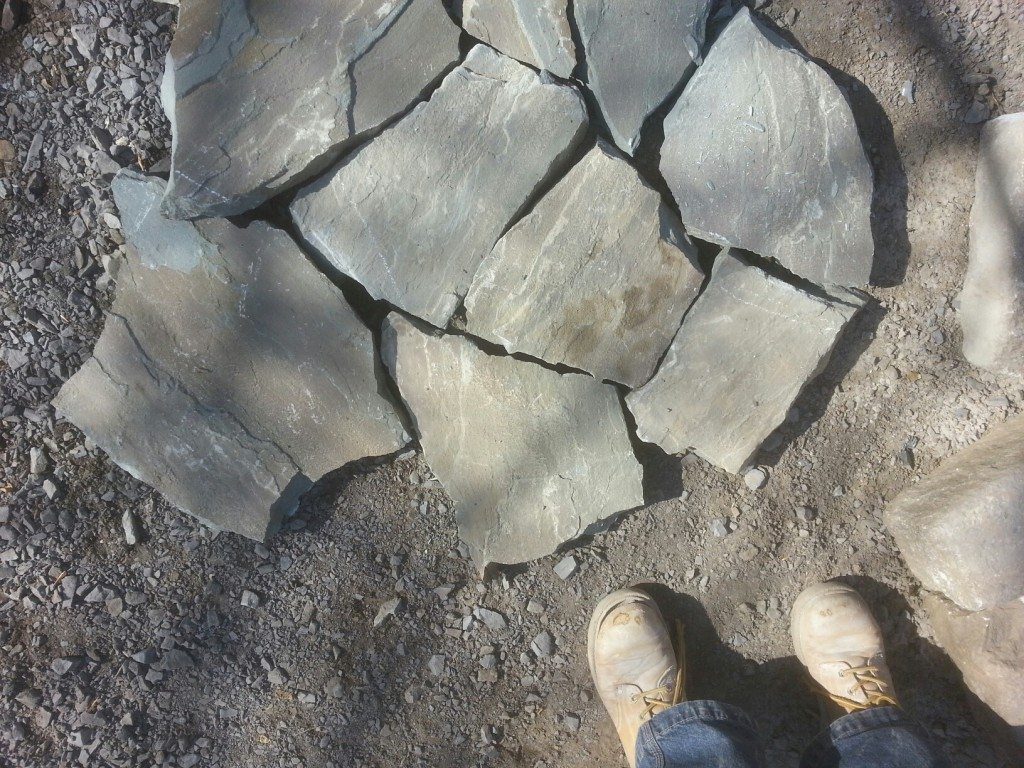
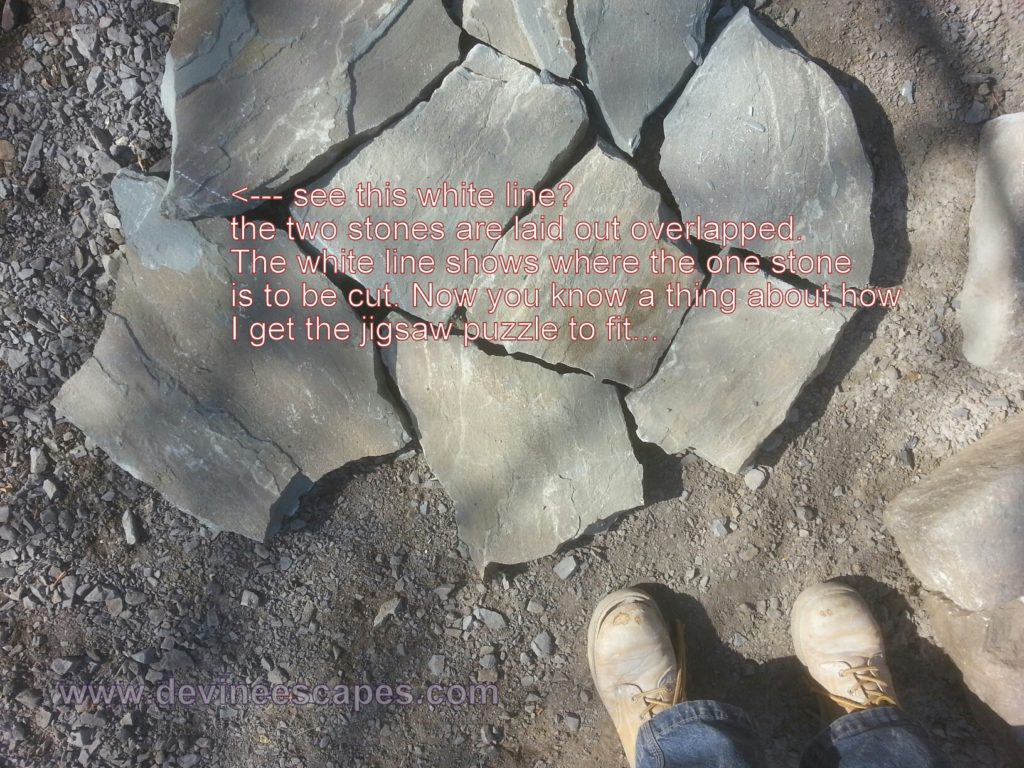
Similar shapes as in the above photo of the clay. Having broken the surfboards into usable shapes, I’ve laid them out so that they fit…with only one exception, one more cut needed.
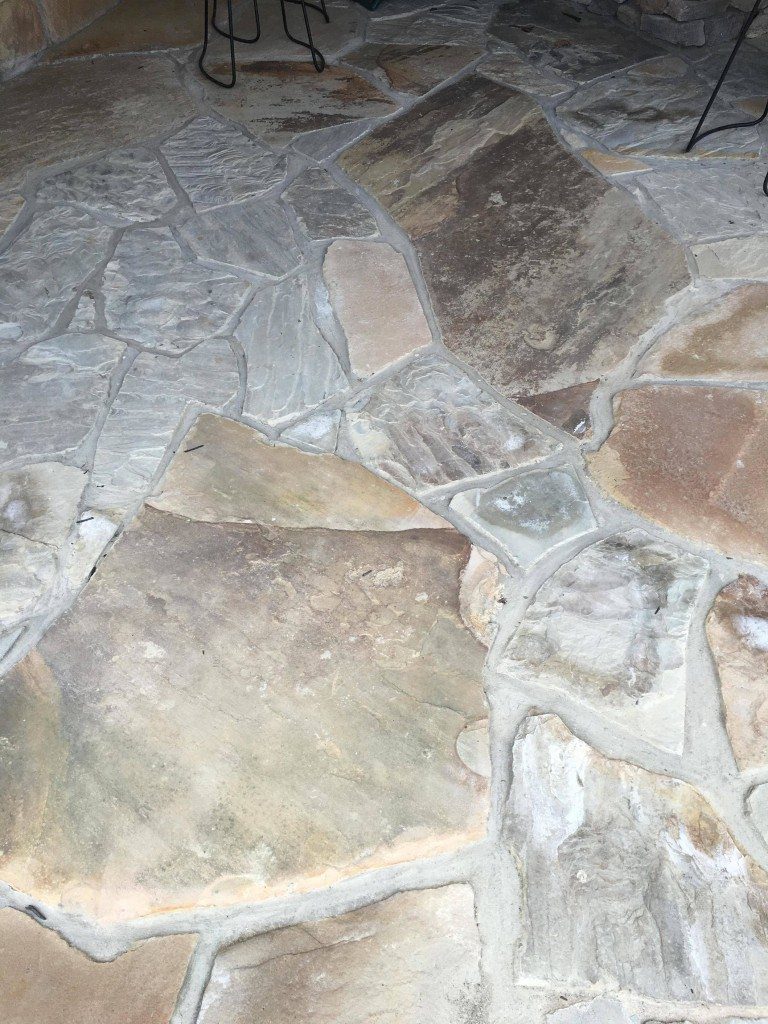
Oh no, what happened here? Here’s a photo that one of my DIY consultation customers sent me, asking me what to do about a poor natural flagstone installation. I see three pac-men, some surfboards and some narrow talon-like pieces….
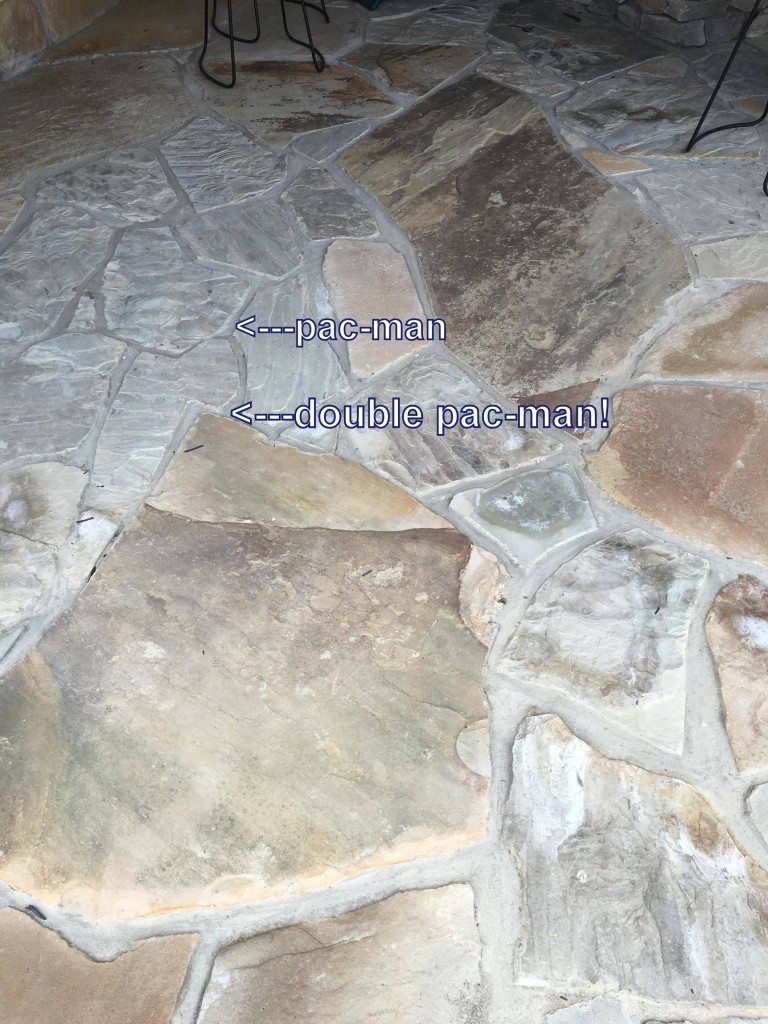
See them? Sometimes–rarely, a flagstone will naturally have broken off with a pac-man shape. Other times, an installer–a mason whose not very well versed in flagstone work, or an inexperienced homeowner–will go and cut two stones so that they fit together, but in pac-man fashion. It just does not look good and should be avoided. Actually, let’s look again.
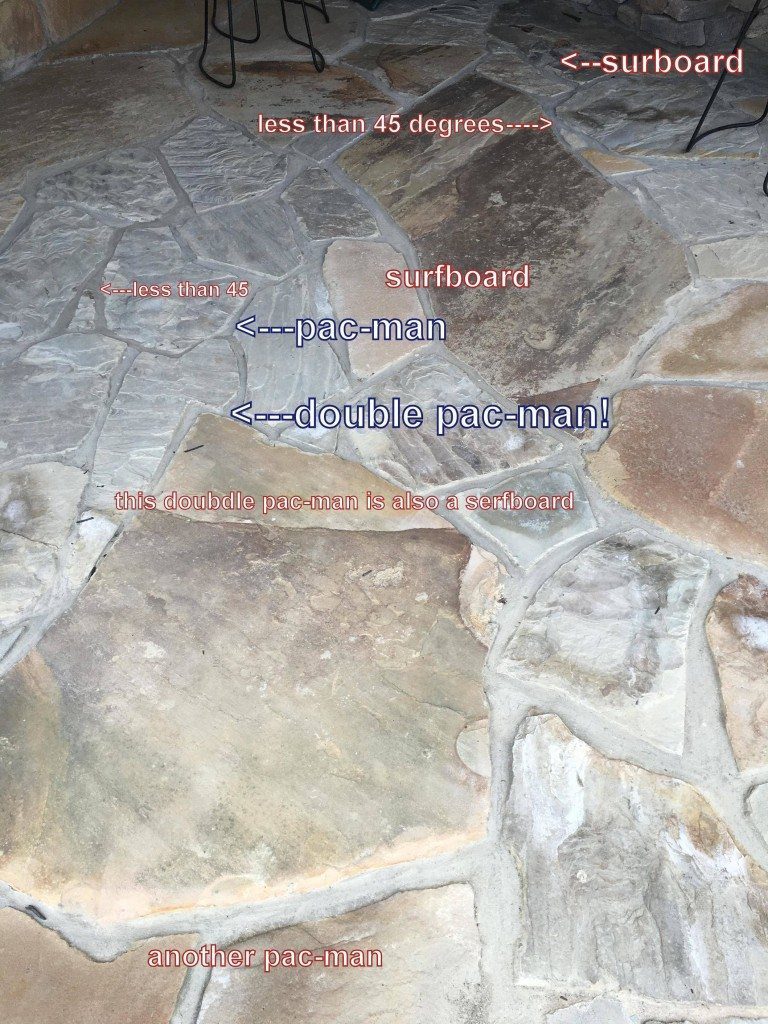
Fact is, I’ve seen a lot of poor natural flagstone installations like this one. A lot of failed attempts. But I generally do not keep photos of them…not trying to shame anyone–just trying to help.
Okay, let’s look at some slightly more “proper” natural flagstone work now:
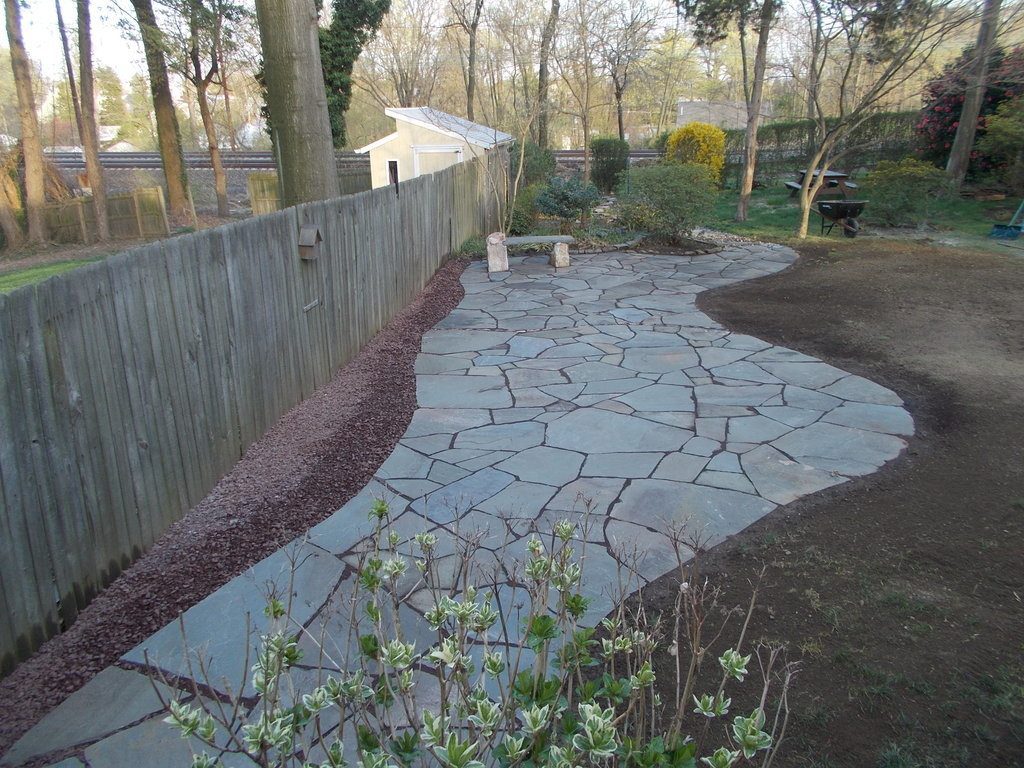
I generally follow these rules and my patios generally end up looking pretty good.
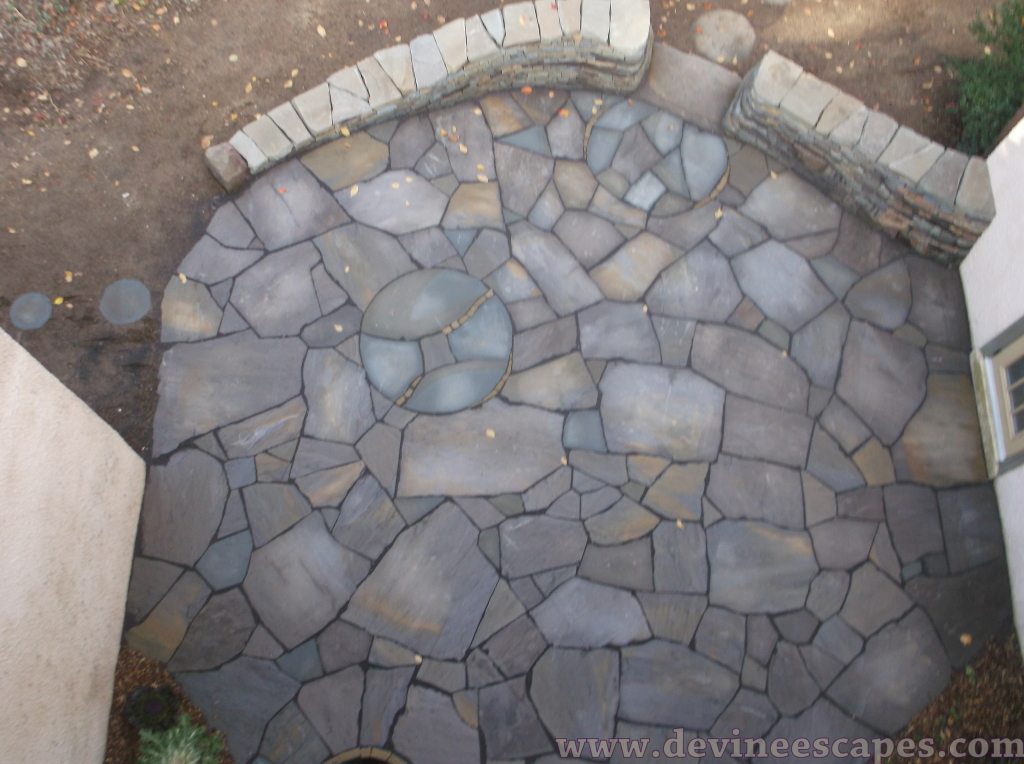
Arial shot. Okay, so there is an artistic touch, with the intentional circular shapes. But I don’t get too many sky-view photos that show the natural shapes so well. So ignore the circular bits–the rest of the shapes do look more like the dried clay, from above.
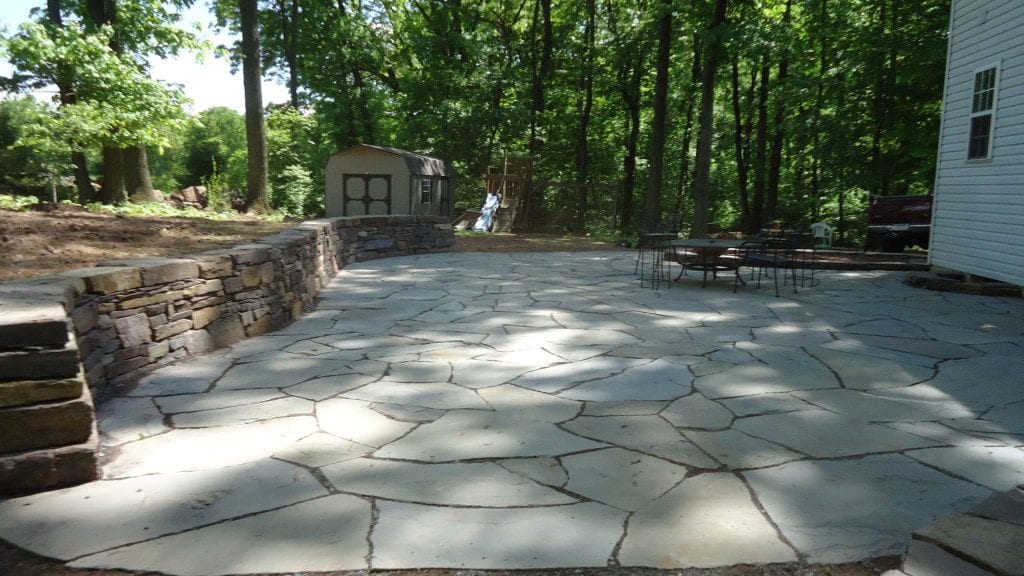
flagstone patio and retaining wall
A fourth rule for how to make your natural flagstone patio look good and feel natural is this:
keep your joints consistent.
Sure, I prefer joints less than an inch or so wide. But whether they are 3 inches wide or half an inch wide, they will look better if kept fairly regular–meaning they stay the same width, rather than ranging from 3 inches, to half an inch, on the same joint. Keep the joints regular and the patio will look like it was built by someone who knew what they were doing and who cared enough to take their time.
But you you do not want the joints to be too perfectly regular…in fact, a fifth rule would be no obvious saw-cuts. If you use a saw or a grinder, rough it up afterwards with a hammer. Or cut from the underside. Eventually I’ll make an article just about how to cut natural flagstone, all the different techniques but that’s an entire subject of its own and will have to wait. Yes, you can just saw-cut every singles flagstone and possibly make it look quite good…but again, this article is about the natural look.
If some of the flagstones in these photos had obvious saw-cuts, they would stand out and in a bad way. I have seen examples of patios where the flagstones were all irregular shapes, but also all saw-cut. Okay, I can appreciate that style too, although I greatly prefer natural edges. But you kind of need to do one or the other–if natural edged flagstone like mine are mixed in with a few saw-cuts, the cuts better be well hidden or it will just look wrong.
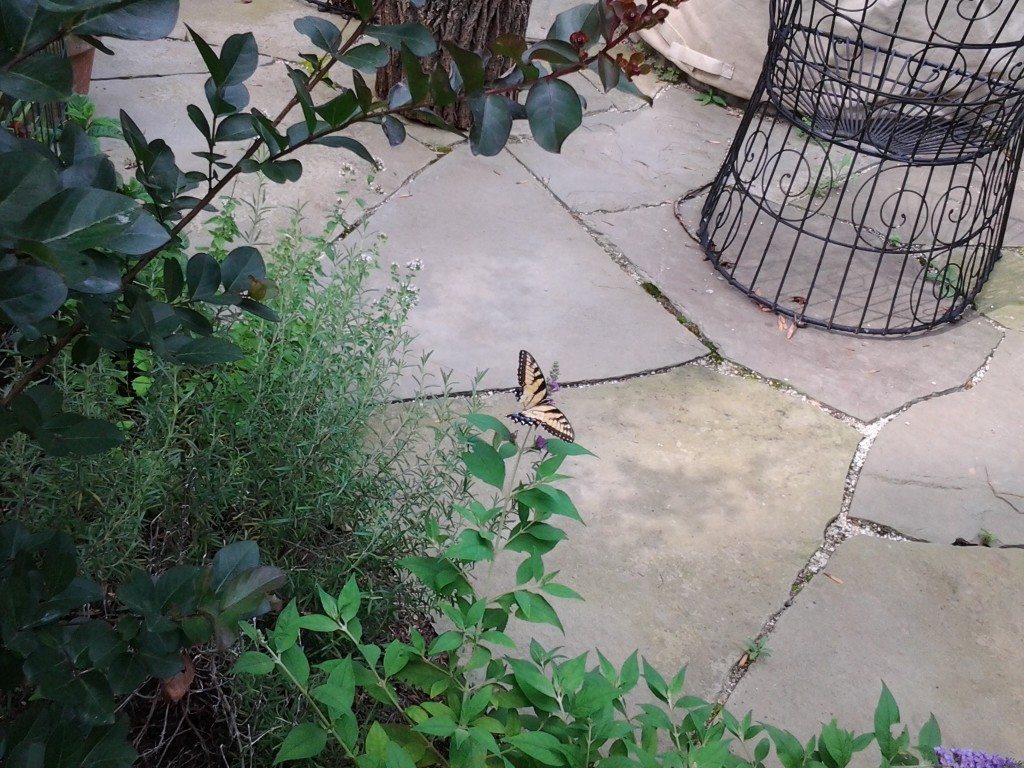 Flagstone work is patient work.
I enjoy teaching people how to do stone work. Check out my other how-to hardscape articles. If you need more help, I offer DIY consultations. Eventually I plan on having a school, maybe an old-style guild, where masonry and stone arts are taught. I may even be persuaded to lead a workshop where a class and I together build a unique stacked stone sculpture together…
2023 Stone Art Calendars available now
Order HERE
Thank you
Devin,
I so admire your work and workmanship. Would love to take a course with you. Especially love the thought of building a stone sculpture under your supervision.
People say that to me sometimes….but then if I set up a workshop, will anybody show up? I am very much thinking that it would be awesome some time, to lead a group of people and actually create one of my sculptures together. Might happen one day. Thanks!
I am so thankful that I found your how-to pages !! Thank you 🙂 I’ve been doing a lot of research on how to put in a dry set flagstone patio and your site is by far the most informative and comprehensive. Many of my concerns were addressed and I will move forward with more confidence to put my patio together next weekend — THANK YOU Devin !
And in case you were wondering, i’m out in Toronto, Ontario (Canada) so i have to get this done before winter sets in 😀
Please open a school!! Basic landscaping is,well, so basic. I love that you add an artistic element to your work.Your projects are amazing and inspiring. Would love to be a student of yours.
I do indeed want to open a flagstone, masonry and stone arts academy. Check back at this website every so often, eventually there will be an announcement.
In the meantime, I will be leading a log furniture making workshop at Stonehedge Gardens in Tamaqua PA, at the Permaculture COnvergence, coming up in June:
http://www.stonehedge.us/papc-home.html
Thank you for the information you provide and for the images that show your expert skill and design. It was instrumental in helping me create a walkway for the main entrance of my home.
I have built some log and twig furniture and was wondering If you have any posts/images of any log furniture work that you have done. Thanks again and I look forward to future posts.
Tim
Lenox, MA
There may be a few other images, here and there on this website, but most of my log furniture projects are shown on this page here.
thank you
Hey, I’m so thankful for your site and I got so much out of the hour phone consultation we did. One question: reading the manual for my 4 1/2 angle grinder, I noticed it says it’s not safe for wet grinding (to keep the dust down). I can’t really find any grinders that are meant for wet cutting though so I assume this is a general rule for any power tool and not something to worry about. Can you confirm if that’s the case? Thanks
I just use dewalt angle grinders. Technically not meant for wet cutting.
My sponge technique is something i only teach to workers who are confident already with cutting dry. My recommendation is to buy a fan and use a dust mask/respirator.
Thank you very much for this. I’m 62 and laying a one-woman job flagstone walkway. I’m not very good with a chisel, so I’ve been breaking some stones by the “drop on top of another rock and hope for the best “ method. I had a very challenging corner, could not find anything to fit. Then I found a large rock which fit in the space. I thought why not?
Awesome, I’m glad I could help! That’s a good feeling…. finding the perfect stone for the space, right? You probably already saw this article but if not, then you might benefit from the video it includes, showing how I trim flagstone with a rock hammer.